As I prepared my camper for my next big trip across the country, I started thinking about all the lessons learned on my first trip. While I knew camper life would probably be the most comfortable way for me to be a digital nomad, my experience with campers was pretty limited. As a child, I’d gone camper camping with my parents. As an adult, I’d gone with friends, mainly to country music festivals.
I’d never been the person responsible for towing, water, electricity, and everything else I’ve learned along the way. Thankfully, resources like YouTube and Google exist and have gotten me by.
If you’re new to camper life or considering it, this is a great article about, what I feel now, are pretty basic things. I didn’t pour over a lot of videos or articles before taking off in the camper. I didn’t know what I didn’t know so it didn’t feel helpful. Maybe, some of this stuff could have been avoided, but I learn best by experience and an experience this has been.
- Along the way, I’ve also accumulated some gear that I think is pretty cool. This post contains affiliate links to some of those things that may earn a commission at no extra cost to you if clicked on and purchased.
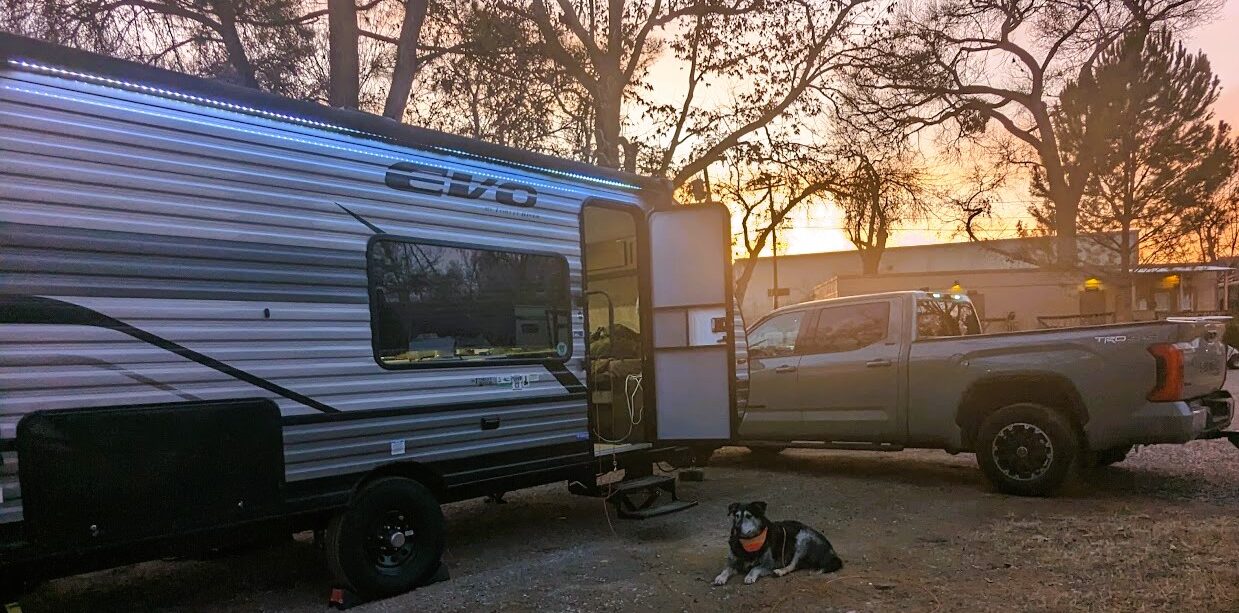
Hooking Up
No, not that kind of hooking up. I’m talking about truck-to-trailer here.

There’s like, a lot of pressure on my hitch and sway bars when they’re hooked up. Which I learned very quickly the first time I unhooked. The dealer had done a tutorial with me when I picked up the camper. My sister-in-law had come with me for morale support my first time towing. When we got back to the house, we stared at it perplexed about unhooking. I realized I had not asked enough questions or taken enough notes.
How not to unhook a camper
If I remember correctly, the first mistake I made was to unhitch the ball and trailer first. The spot where we had the trailer parked was uneven so the truck ball was sitting up quite a bit higher than the trailer hitch. As I continued to crank the trailer up, the ball finally released and the sudden drop ripped the entire trailer light plug from my truck. Luckily it was an easy fix and clipped back into place quickly.
Then, I started on the sway bars, not realizing I should have done them first. When I flipped the release latch, with some difficulty, the pressure caused the latch to release really really fast. The chain flew up, the bars smashed into the ground, and my poor nail got caught up in all the commotion and ripped half off. I was a little more careful on the other side, standing as far back as I could, crudely using the socket tool to hook onto the latch and spin it. There was still a lot of pressure, but my nails survived the other side.

The Right Way
With all the pressure, chains swinging, and bars slamming, this definitely didn’t feel right. I felt like you’d hear about a lot more injuries doing it this way. Before unhooking again, I watched some YouTube videos and realized the error of my ways. When hooking the sway bars up, you typically lower the trailer about halfway onto the truck ball, attach the sway bars, and then go the rest of the way down. When you unhook, you do the reverse. Take the trailer halfway off the ball until the sway bars are loose and then unhook them. It makes it so much easier and much less dramatic. I haven’t broken any nails since.
Propane
Sometimes, it takes a couple of lessons before you finally learn. Twice, I ran out of propane on 30-degree nights and woke up to a cold, cold camper. Fortunately, I have a heated blanket and was able to keep the cold at bay. I also have a sleeping bag rated for 30-degree temps which helped out.
I learned in cold temps, to always check my propane levels early in the day. Doing so gives me time to get the propane filled if needed and I don’t have to risk running out in the night.
I use the Mopeka Pro Check Propane Guage to keep an eye on propane levels. I don’t like to go to bed on cold nights with less than 20% in the tank.


Length of Stays
On my first trip, I had a deadline to be in the Florida Keys by the end of March. I was planning to spend spring break with my niece who would be there visiting my parents. I’d be leaving Olympia, WA on January 5th giving me around 3 months. I planned my stops around things I wanted to see, but quickly realized, I’d planned too many stops and wasn’t seeing as much as I wanted to.
During the week I’d hunker down and work my standard 8-5. When I was done, it was typically dark, limiting outdoor options. Small-town shops were closed. This wouldn’t have been too big of a deal, but my driving was mostly planned for the weekends. If I was leaving on a Saturday, I’d miss out on getting to explore the area.
I quickly realized I was enjoying myself more if I stayed for a minimum of 2 weeks and could see more. This next trip around, I plan to stop places for a minimum of 2 weeks and stay at least one weekend.


Planning Travel Days
When planning travel days, the math in my head went something like this:

According to the math, on a day I wasn’t working, I had 16 hours to drive. Therefore, a 12-hour drive should be fine. That still gave me 4 hours to mess around. But, as flawless as my math seemed, I found it didn’t quite add up.
At around the 10-hour mark, things get weird. The road feels like it’s floating, shadows move, your butt is numb, and your lids are heavy. And, because I was driving longer, my stops were usually longer, making a long day longer. I’d crawl in the back with Trixie for a quick cat nap or go for extra long walks to wake up and stretch out. When I did finally arrive at my destination – there was still a lot to do. Finding your spot, backing up the trailer, and connecting everything, usually in the dark.
I didn’t love this style of travel or the exhausting days it created. I now plan trips for 10 hours or under. If I’m arriving somewhere late, I make sure that it’s an easy pull-through site or a large parking lot I can simply pull into. It makes getting to your spot a bit more enjoyable and you get to relax faster and longer.


Battery Life
It took me about 6 months to learn about my battery life. All I knew was that it powered my lights and USB ports when I wasn’t connected to power. And that it recharged when the truck was plugged in and we were driving.
The first few months, I didn’t stay anywhere longer than a night without electricity. I’d have a couple of hours of putzing around, using lights and then I’d go to bed. In the morning, I’d still have enough light and USB power for whatever I needed before taking off. This left me with the delusion that my battery life was good for at least 8 hours.
The first time I boondocked in WI without electric hookups, it was hot. I had USB fans and the overhead fans going. After a couple of hours though, everything shut off. Perplexed my battery would die so quickly, I did some research and found that it’s pretty normal.

Alternate Power for the camper
Luckily, besides the weather cooling off enough at night so we could sleep, I also have a Renogy Portable Power Station. Unfortunately, I hadn’t used it much up until that point and didn’t know if it would work on the entire camper. But, to my delight, in full sun, with 2 panels, the amount of energy generated is enough to keep up with the basics in the camper. It wasn’t enough for air conditioning, but I could at least charge fans and keep them running.
The Renogy also comes with a car charger, which is nice if I know I’m going to be stopping at a place without electricity. I’ll have that charged during the drive and have some extra power for laptops, phones, fans, whatever in case it’s needed.
I have considered putting solar panels on the roof or getting a generator, but haven’t regretted not doing those things yet. I don’t necessarily enjoy the additional worries of off-grid camping when I have to work during the week. (During my time in WI, I wasn’t working which is why I was good with boondocking for a few days) Even with solar panels or a generator, you still have to be worried about the sun shining and gas supply. It’s just less worrisome to book a site that has everything you need.
Under Pressure – Camper water
This was a fun one. I stepped out of my camper one day in San Diego, maybe a week into full-time camper life, and was shocked to find a pool of water surrounding my camper. Panic set in as I wondered if it was my gray water or black water. A quick inspection later, I found what looked to be clean water coming out of the hose under my camper. The hose was labeled fresh tank overflow.
Side note – How water works in a camper
For my non-camper folks, you have 2 available water sources for your camper, city water, and a freshwater tank.
City water uses pressure to deliver water to your camper just like a house. You just hook it up, turn on a faucet, and it works.
The freshwater tank is a tank that can be filled when a city connection is not available. Mine holds 38 gallons. When using the tank for water, you have to switch on a water pump to have running water.
How did the tank fill?
At this point, I had never filled my fresh water tank. I was also troubleshooting a leaky water heater. Confused about why water would be coming out of this & if the 2 issues were connected, I decided to call my camper sales guy.
He insisted I must have accidentally overfilled my fresh water tank. The thing is, filling your fresh water tank is a very intentional thing. It’s a completely different connection from the city water connection. I was 100% sure that I had never filled this tank. I even sent pictures of my water line connecting to the city connection, but nothing attached to the freshwater connection. He said he’d check with the techs and call me back. In the meantime, I started googling.


ChatGPT to the rescue
After some time googling and sifting through the owner’s manuals, I realized the two water issues were not connected. I decided to see what ChatGPT had to say and asked, “Why is my freshwater tank in my camper filling when connected to city water” and found my answer.
Apparently, when connected to city water, if the pressure is too high, it can cause a switch to flip in the water pump, telling it to start filling your fresh water tank. Normally this would be a supervised task, but as I had no idea, the freshwater tank was overfilled. As it’s supposed to do when overfilled, let the excess water overflow.

According to what I found, it’s recommended to have a pressure valve regulator attached to your city water connection to prevent this from happening. I promptly ordered one and haven’t had any issues since.
I did get a call back from the RV place, once again telling me I had overfilled my fresh water tank. The salesman didn’t seem convinced as I explained the reason why the tank was overfilled. I’ve since run into a couple of other folks on the road who have had similar experiences and also recommended the regulator.
As for the water heater, when winterizing the camper, I took the anode rod out. A little rod that catches minerals in the water. The instructions I had been using said that hand tightening the rod should be sufficient, however, I ended up buying a socket wrench to tighten it with and had no more issues.
Outlets – What the heck is GFCI?
About a week into my stay, my outlets decided to stop working. After some initial troubleshooting, I found that 2 outlets did still work. All the outlets that weren’t working had GFCI stickers on them. I didn’t know what GFCI meant, but I figured that probably had something to do with it.
Now, wiring and electricity are just not my thing. Prior to takeoff, with some difficulty, I managed to hook up a backup camera to my trailer but I hated every second of it. Okay… maybe that’s a little dramatic and hate is a strong word, but for whatever reason, it’s a tough topic for me.
Even so, I began the painful process of learning about GFCI outlets and how they work. My understanding now is that GFCI outlets are usually all connected together, if one faults, they all fault. The main one just had to be reset. It had been raining, seemed plausible that maybe one got wet. Easy fix!
Feeling good about what I learned and the easy fix, I reset the master outlet in the bathroom. My heart freaking shattered when it did not resolve any issues. Many YouTube videos later and at the advice of another camper enthusiast, I decided to try and change out the master outlet myself. Just unhook everything and then hook up a new one the same way. Seemed easy enough.
Well, a couple of hours and many curse words later, it still wasn’t working. I gave up at that point. Extension cords and outlet extenders would work for now.
Once I got to FL, I revisited the issue with the help of my Dad. We weren’t getting any indication that the wires were even live anymore and I thought it was possibly a manufacturer issue. I’d have it looked at next time I had it serviced.
Whoops – Lesson Learned
It turns out, that when I mounted my monitors, I drilled through a wire. When the outlets stopped working, I’d been living and working out of the camper for at least a week so I didn’t even consider this but something must have jiggled just right and caused the wires to finally snap.
While it was a bummer to learn it was my own mistake, I did gain some knowledge about GFCI outlets and I managed to not shock myself while poking around in them, so I’ll take that as a win.
Dumping Gray and Black Water
My first time dumping my gray and black water, I was so confused. It seemed simple enough, hook up one end of the hose to the camper, the other end to the ground pipe, and open the valve. But, I couldn’t get the end of my hose to twist into the ground pipe. Never having done it, I thought maybe this was normal and opened the valve to my gray water. (Yes, I know you’re supposed to do the black water first, but if I’m unsure about something and going to end up with a mess, I’d rather it be the gray water.) Fortunately, no water escaped, but it was a major pain in the ass.
Also working against me was gravity. My tube was just uphill from the ground pipe so I had to carefully lift, it while making sure my unattached hose didn’t lift too much out of the ground pipe. I sat there, carefully lifting the hose and dumping the water until I got sick of it. There had to be an easier way. Off to Google I was.
The Stink Slink
That’s when I discovered the stink slink. A nifty little device your hose sits in that slants downward so gravity can do its work. The answer to all my problems, well almost. I think after a little more futzing with the hose end, I was able to get it to attach to the ground pipe correctly. Once I had the stink slink in place, things went much smoother. There have still been a couple of sites that I have to help it along, but overall it’s been a great little investment.


Just a tiny home on wheels
You might be wondering by now why someone would want to do this day in and day out. But these types of issues are far and few between. Any home is going to have a few learning curves when you first move in and the camper was no different. When everything is hooked up and working, camper life is quite cozy.


What a great article! I loved hearing about your trials and errors. So much take away!
Thank you so much!
These are fantastic anecdotes to learn from 🥰
I love remote work…it’s such an amazing opportunity that gives you the freedom to work and live like this.
Keep sharing these lessons Kati!
PS – Nice Truck 🛻
Thanks Jason! I’ve definitely enjoyed remote work the past few years!